If you have AVG Internet Security installed on your PC, you may have difficulty in sharing files via Omniclient. You need to add some specific firewall rules to AVG in order to allow Omniclient to connect to shared directories on the PC.
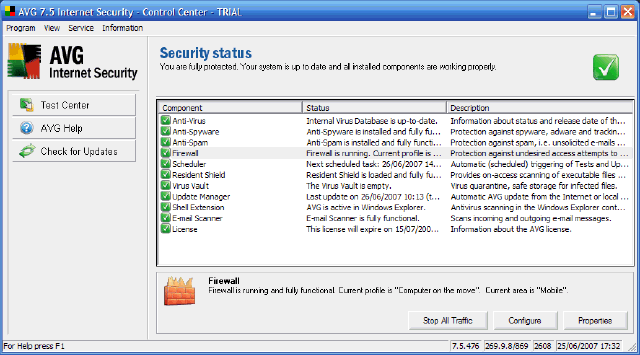
1. Firstly, open the main AVG Control Centre by right clicking on the AVG icon on the right of the task bar. Select Launch Control Center.
2. Highlight the Firewall and click Configure. You should see the Firewall Configuration window. Click on the System tag at the top of the window and you should see something similar to that shown in the screenshot below.
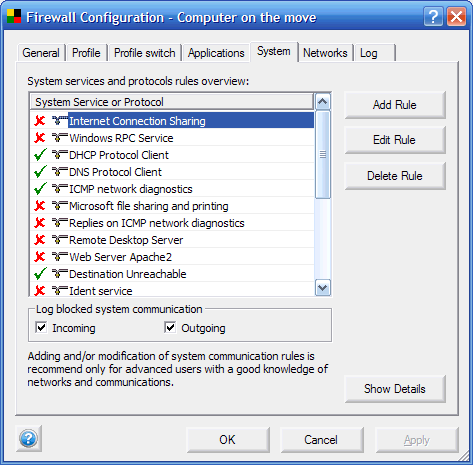
3. Click on Add Rule. This will open a new System Service Rule Properties dialogue window from where you can define the rules for allowing access from Omniclient (fig.3). Enter a suitable name, such as Omniclient on RISC OS.
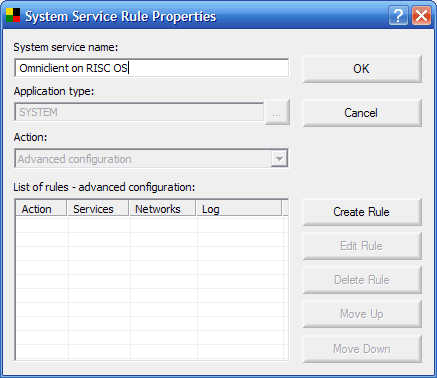
4. You now need to create a new rule, so click on the Create Rule button. This allows you to create new rules (fig.4).
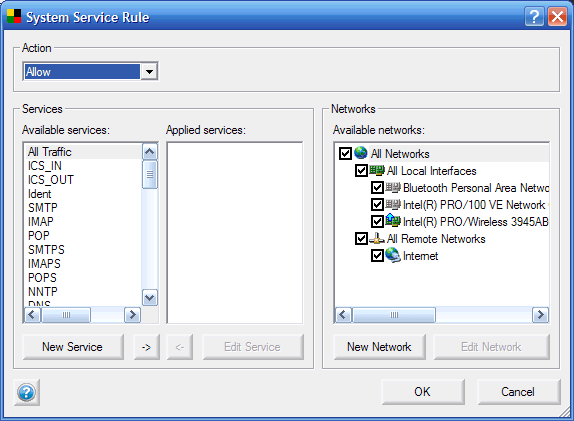
5. Because the two services you require (netbios-ns and netbios-ssn) are not available by default, you have to create two new Services, so click on the New Service button at the bottom of the list of available services.
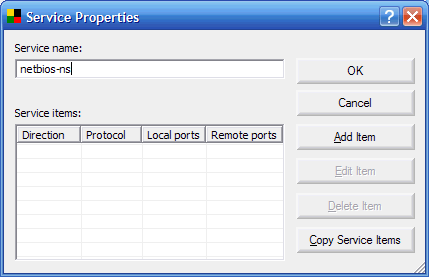
6. You will see the window in fig.5 and you can enter a name for the service. In this case netbios-ns
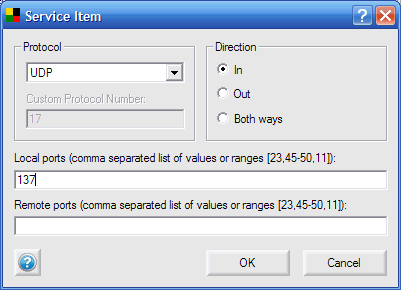
7. You now need to add two new service items to this rule, so click on Add Item. Now set the parameters shown in fig.6

Set the Protocol to UDP from the drop-down menu and set the Direction to Out.
Leave the Local ports blank and enter 137 for the Remote ports.
Click OK to complete adding the item.
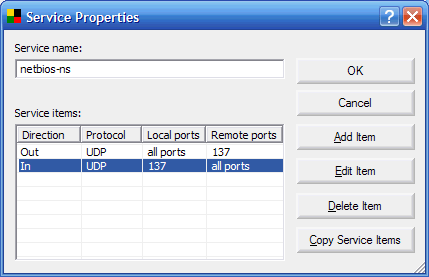
8. Now repeat step 7 for the incoming rule (fig.7).
Set the Protocol to UDP from the drop-down menu and set the Direction to In.
This time, enter 137 for the Local ports and leave the Remote ports blank.
Click OK to complete adding the item.
9. You've now successfully created the relevant rules for NetBios Name Service (netbios-ns) which runs on UDB port 137 (fig 8).
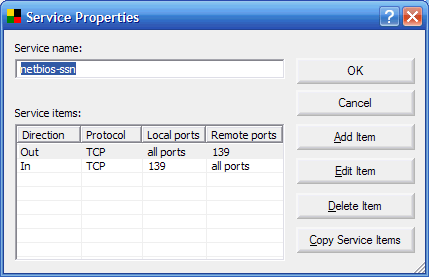
10. You now need to effectively repeat steps 6-9 to create a rule set for NetBios Session Service, which runs on TCP port 139. You should then end up with something which looks like fig.9
11. Now click on OK and you should end up with the original System Service Rule window (fig.10) containing the two rule sets netbios-ns and netbios-ssn in the Applied services panel.
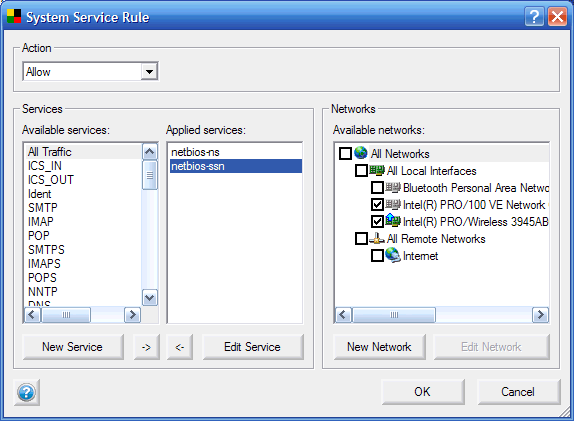
For security, you don't want these new rules to apply to all network connections (potentially those coming from across the internet) so you want the new rule to only apply to local network interfaces. Click on the various boxes to the right of the window in the Available networks panel, to disable everything except your local interfaces. This will ensure that the new rules will only apply to computers attempting a connection from inside your network.
Click OK to accept all the changes and close the window.
12. You should now see the original window you opened at step 3 when you first started configuring the firewall. It will now look something like fig.11 where the new services are listed in the List of rules.
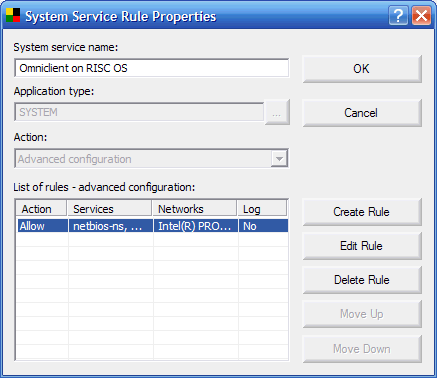
Click OK in this window to accept all the settings and close the window.
If all is well your new rules should be listed in the main AVG firewall configuration window, shown below.
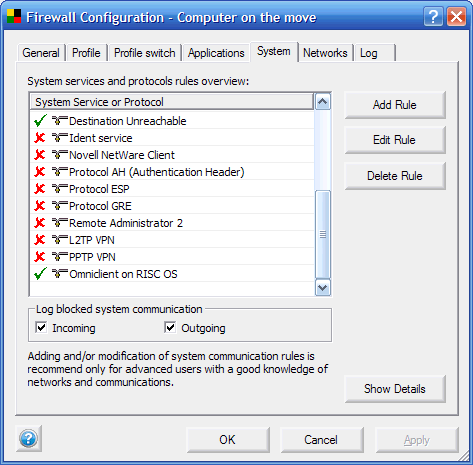
Now click OK to close the window.
You have now successfully configured your AVG protected Windows XP to allow connections from Omniclient running RISC OS computers.
|
Last edit: 10th Apr 2016 at 4:55pm (3481 days ago) |
|
| ||||||||||
|
| ||||||||||||||||||||